Treating equinus with TSF◇
Nima Heidari, FRCS; Royal London Hospital, UK
The views and opinions expressed in this section are those of the surgeon.

Introduction
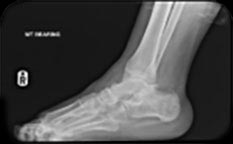
Equinus deformity may present as a congenital deformity or occur as a result of lower limb trauma (Figure 1). Correction using the TSF◇ mitigates the need for broad soft tissue dissection and its associated potential complication.
A regional block is preferred to control immediate post-op pain. The limb is draped above the knee, with sandbag under the buttock and patella facing the ceiling. Ideally, the limb can be suspended or held ina locally fashioned suspensory device.
If Tendo Achilles is tight, a gastro-soleus release at the musculo-tendinous junction might be necessary in more severe deformities. However, avoid a triple cut through the tendinous part which can result in loss of power.
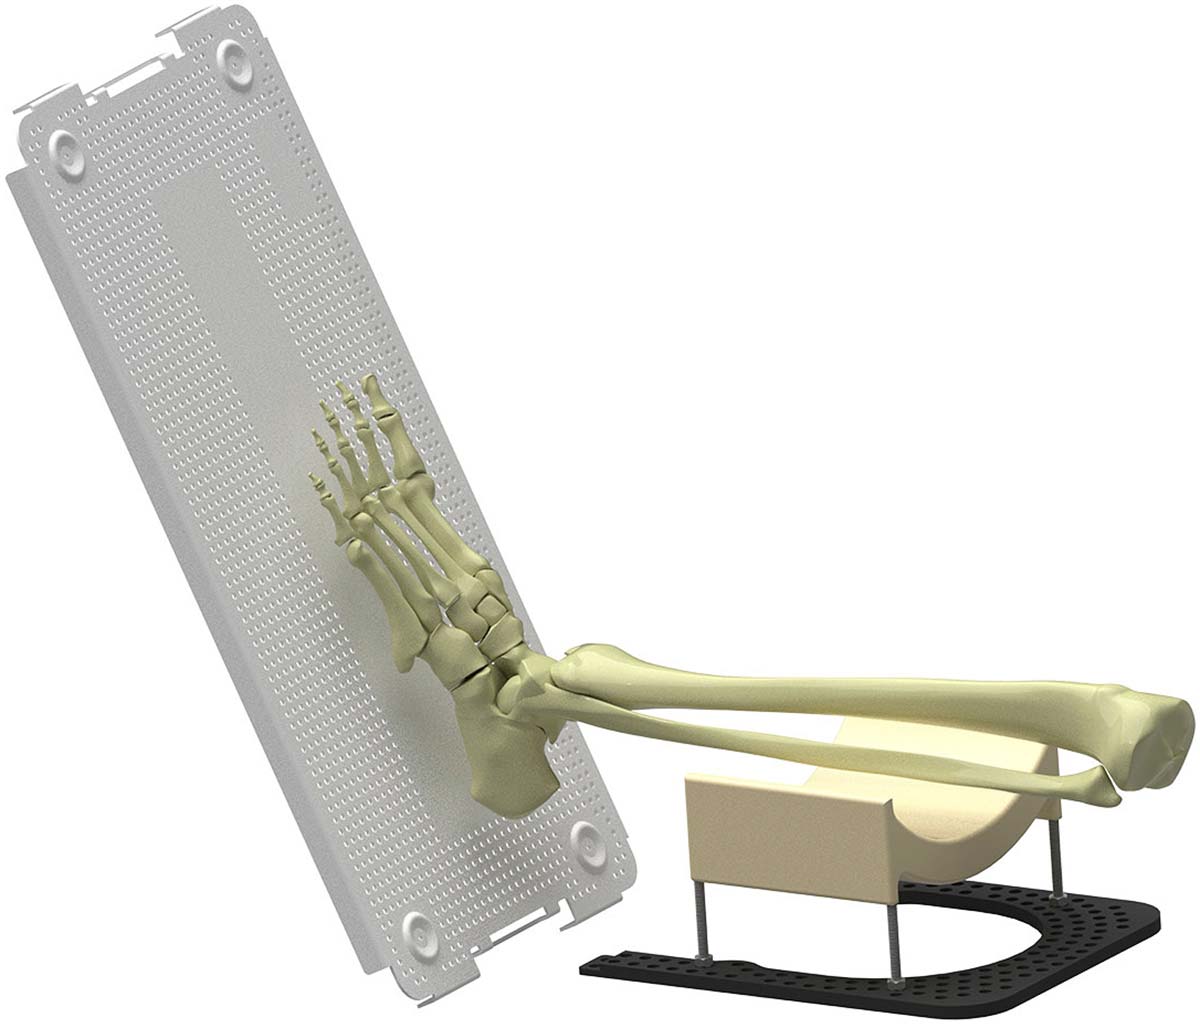
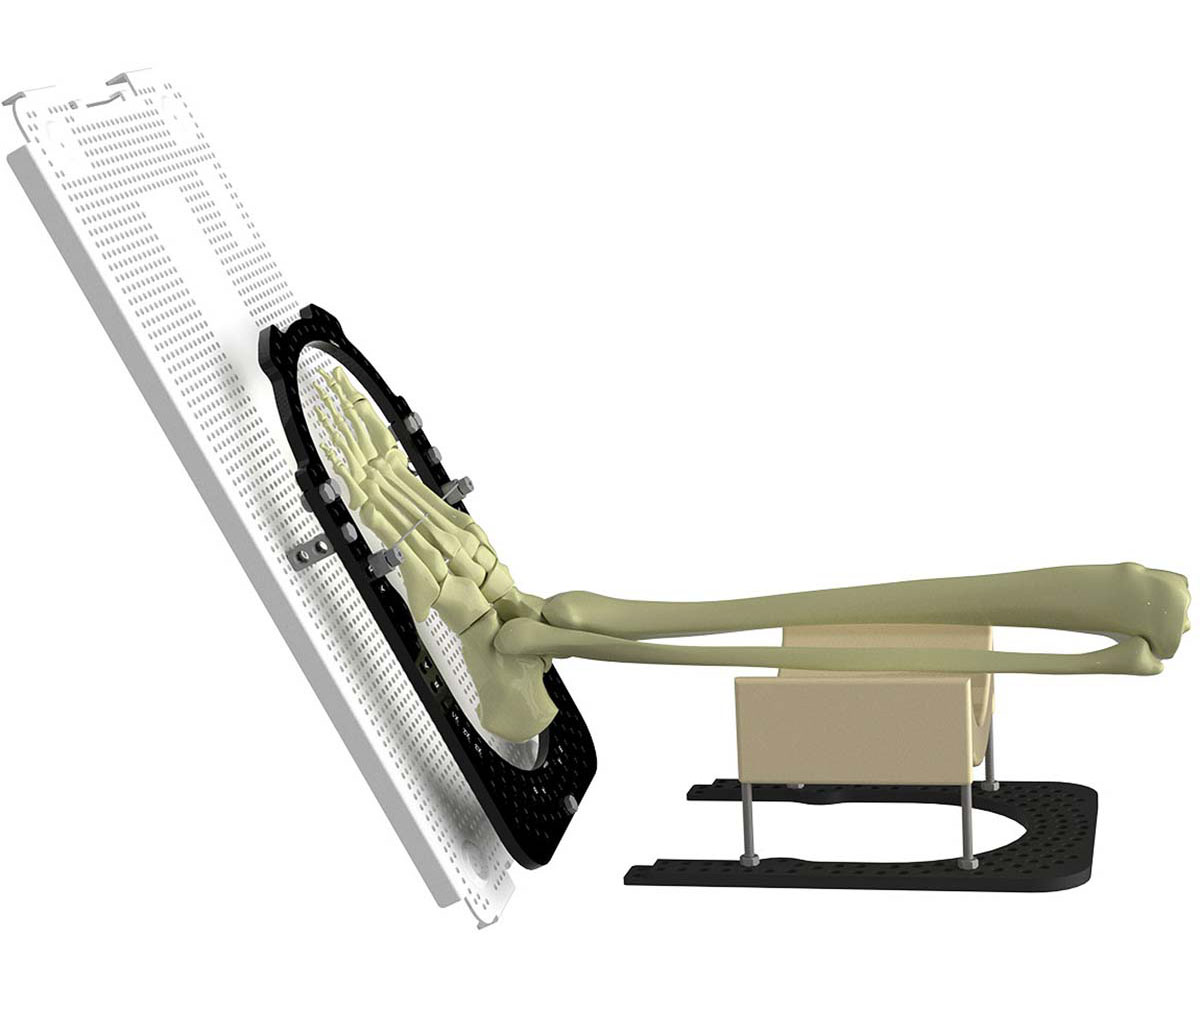
A flat surface, such as the lid of an instrument tray, is used to simulate a load-bearing surface intra-operatively (Figure 2a).
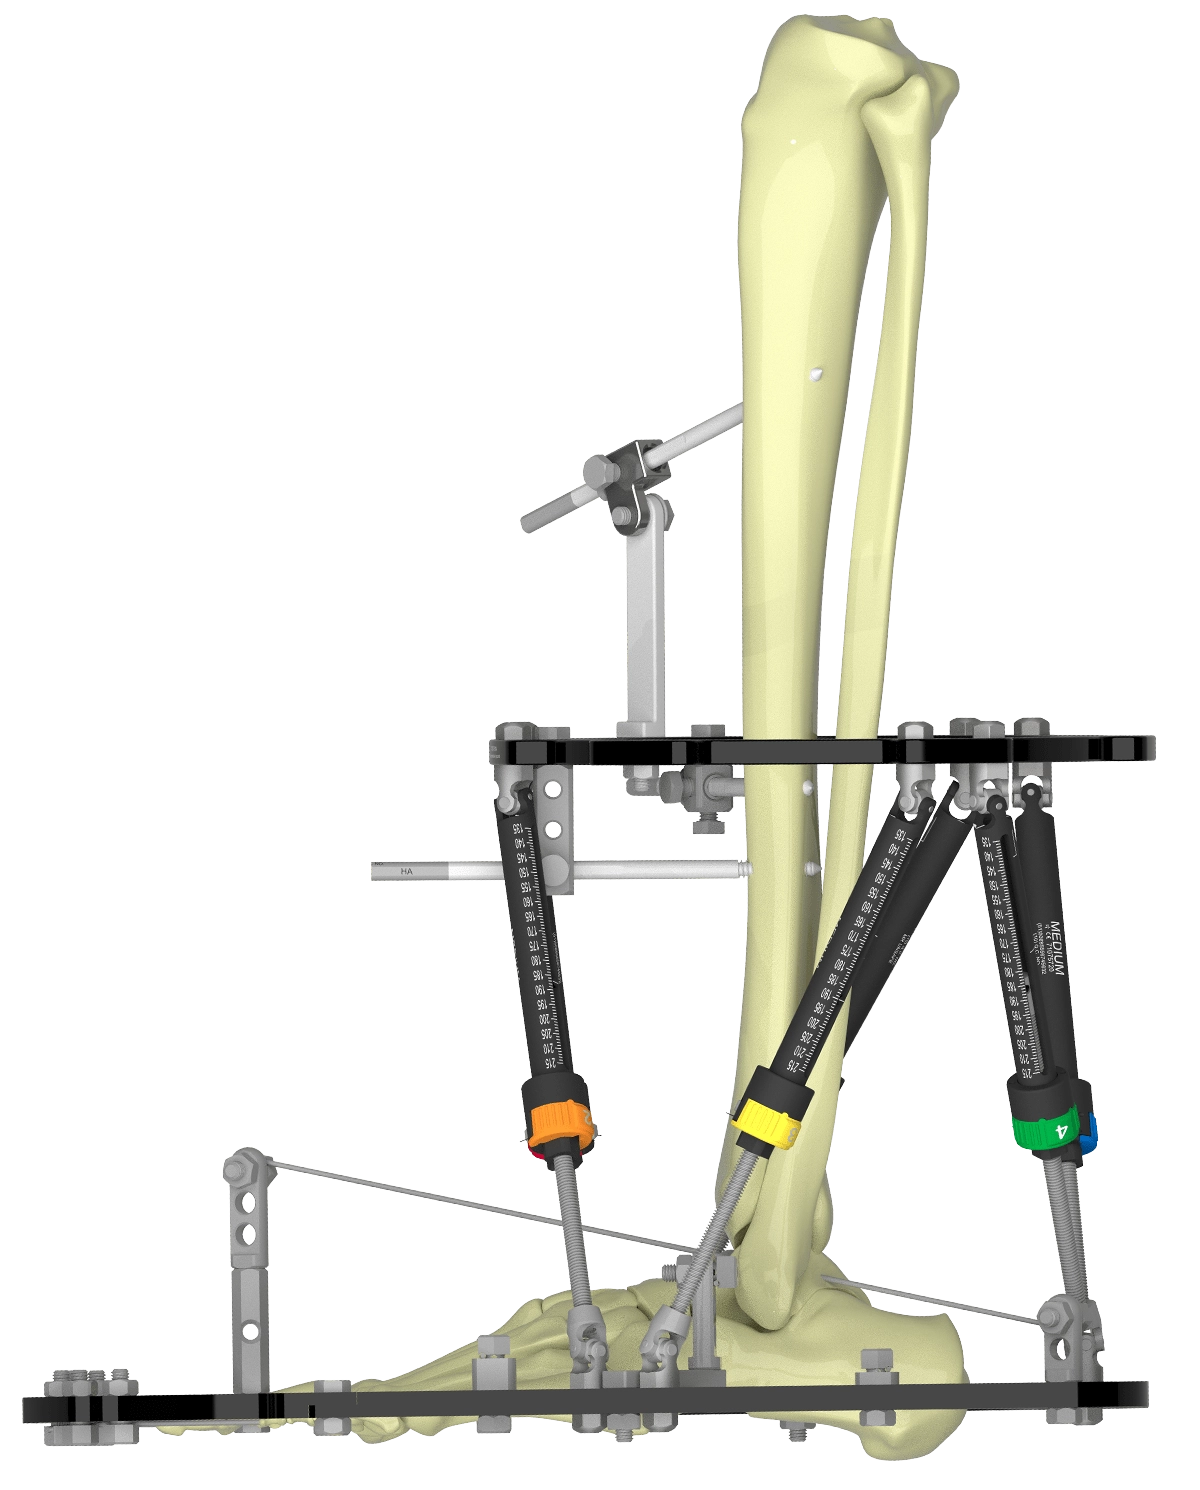
Frame construction
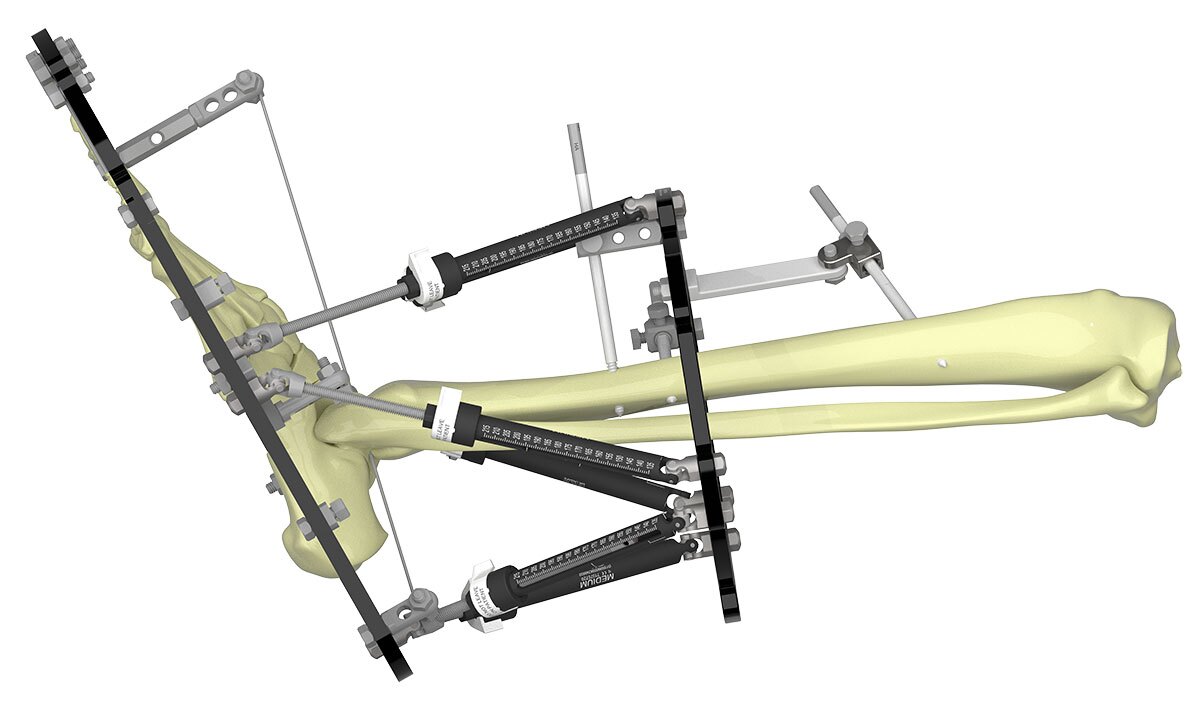
A Full Ring of appropriate size for the tibia is chosen and slid over the foot to rest at the knee until later. A construct of Foot Ring closed with Half Ring and three 2H Ranchos on the plantar aspect is constructed (Figure 2b). When positioned against the simulated load-bearing surface, the Ranchos serve to appropriately proximalize the Ring on the foot (Figure 2c).
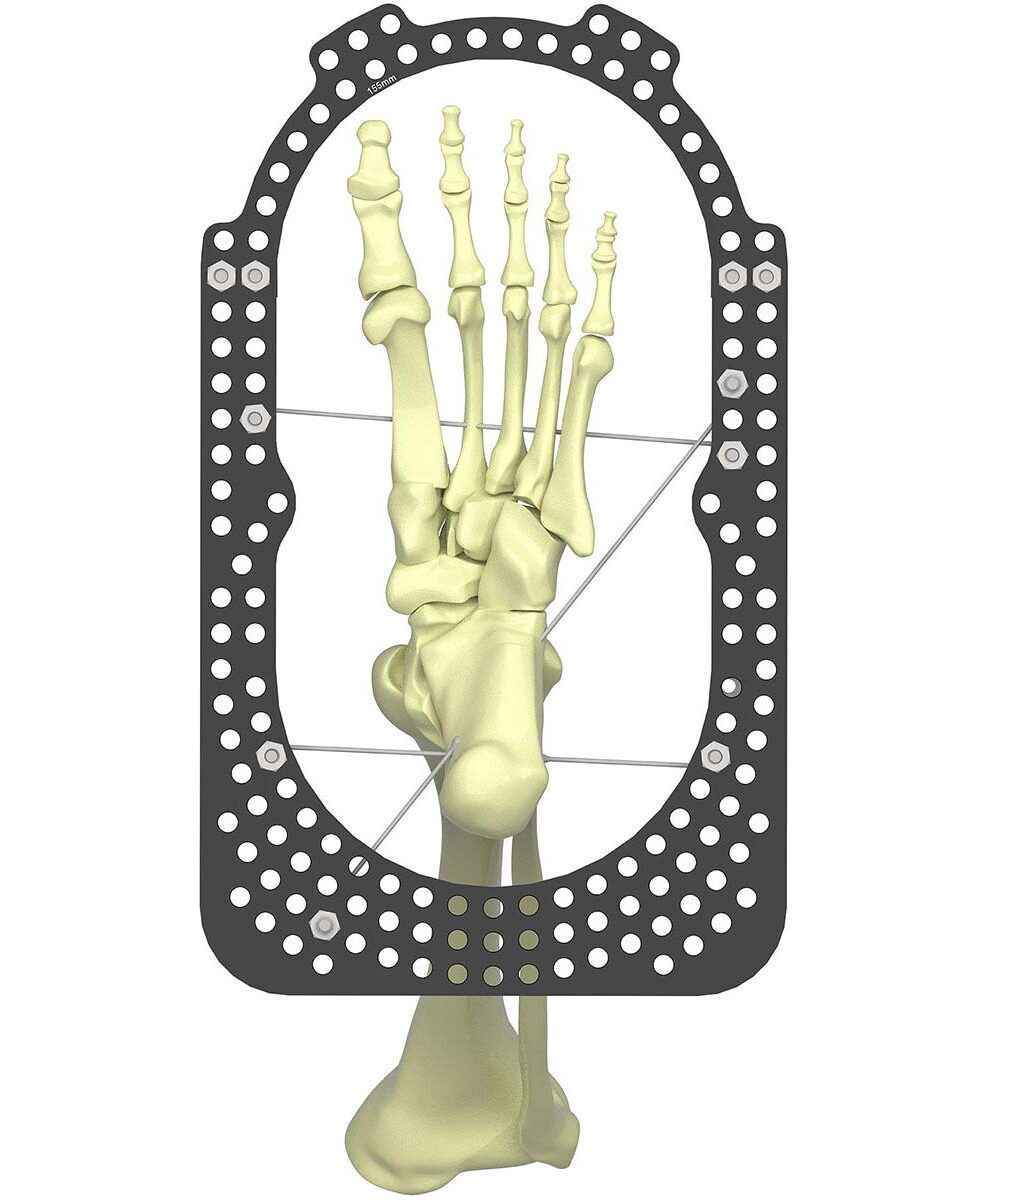
An Olive Wire is inserted lateral to medial through the calcaneus. A Smooth Wire is inserted through the metatarsals. Both wires are tensioned to 90kg. Dressings are applied immediately to minimize risk of pinsite haematoma. The wires are bent over the Wire Fixation Bolt and rotated to snap flush with the bolt. A third wire, an Olive Wire, is inserted posteromedial to anterolateral through the calcaneus (Figure 2d).
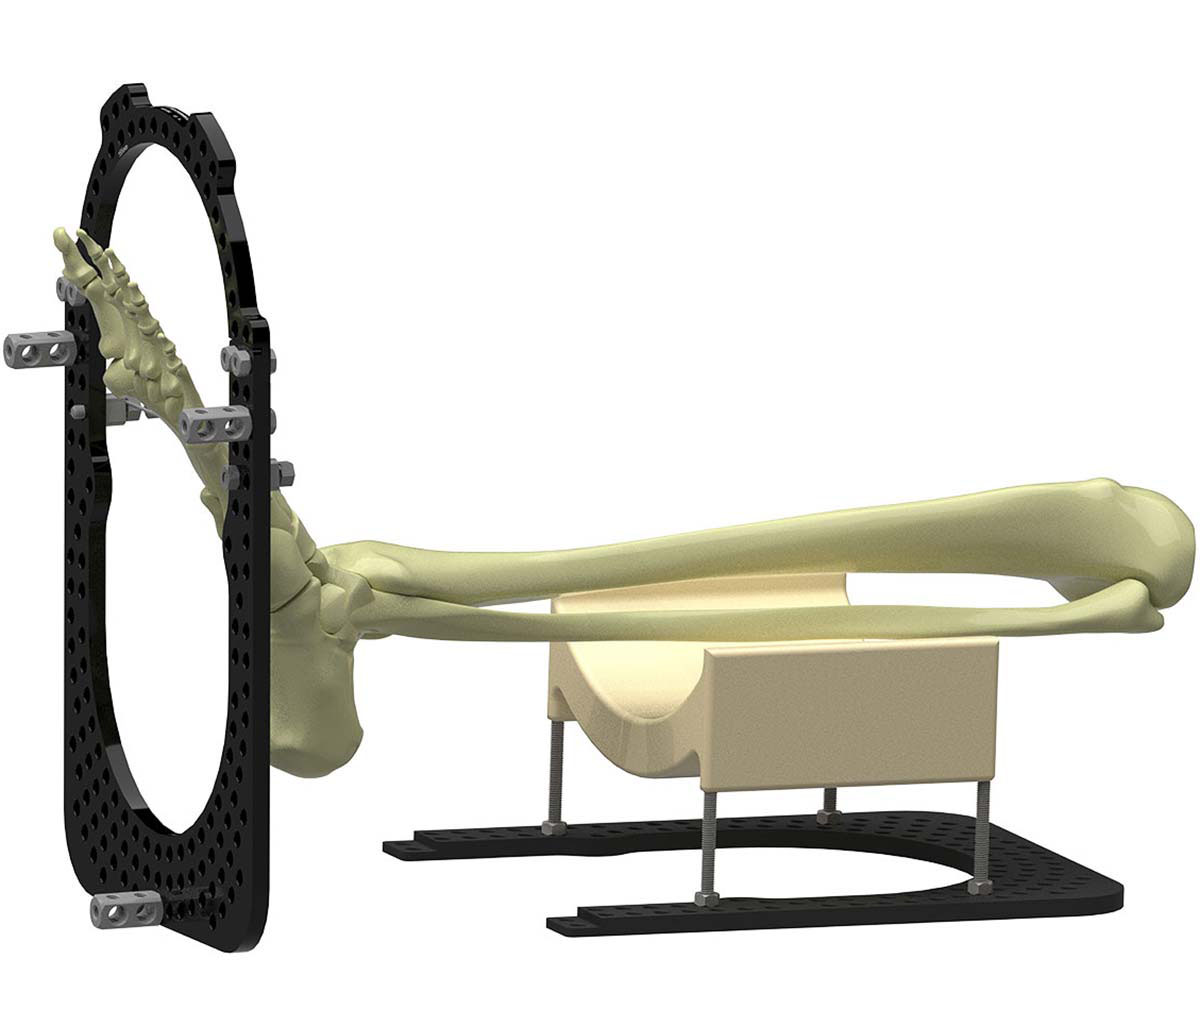
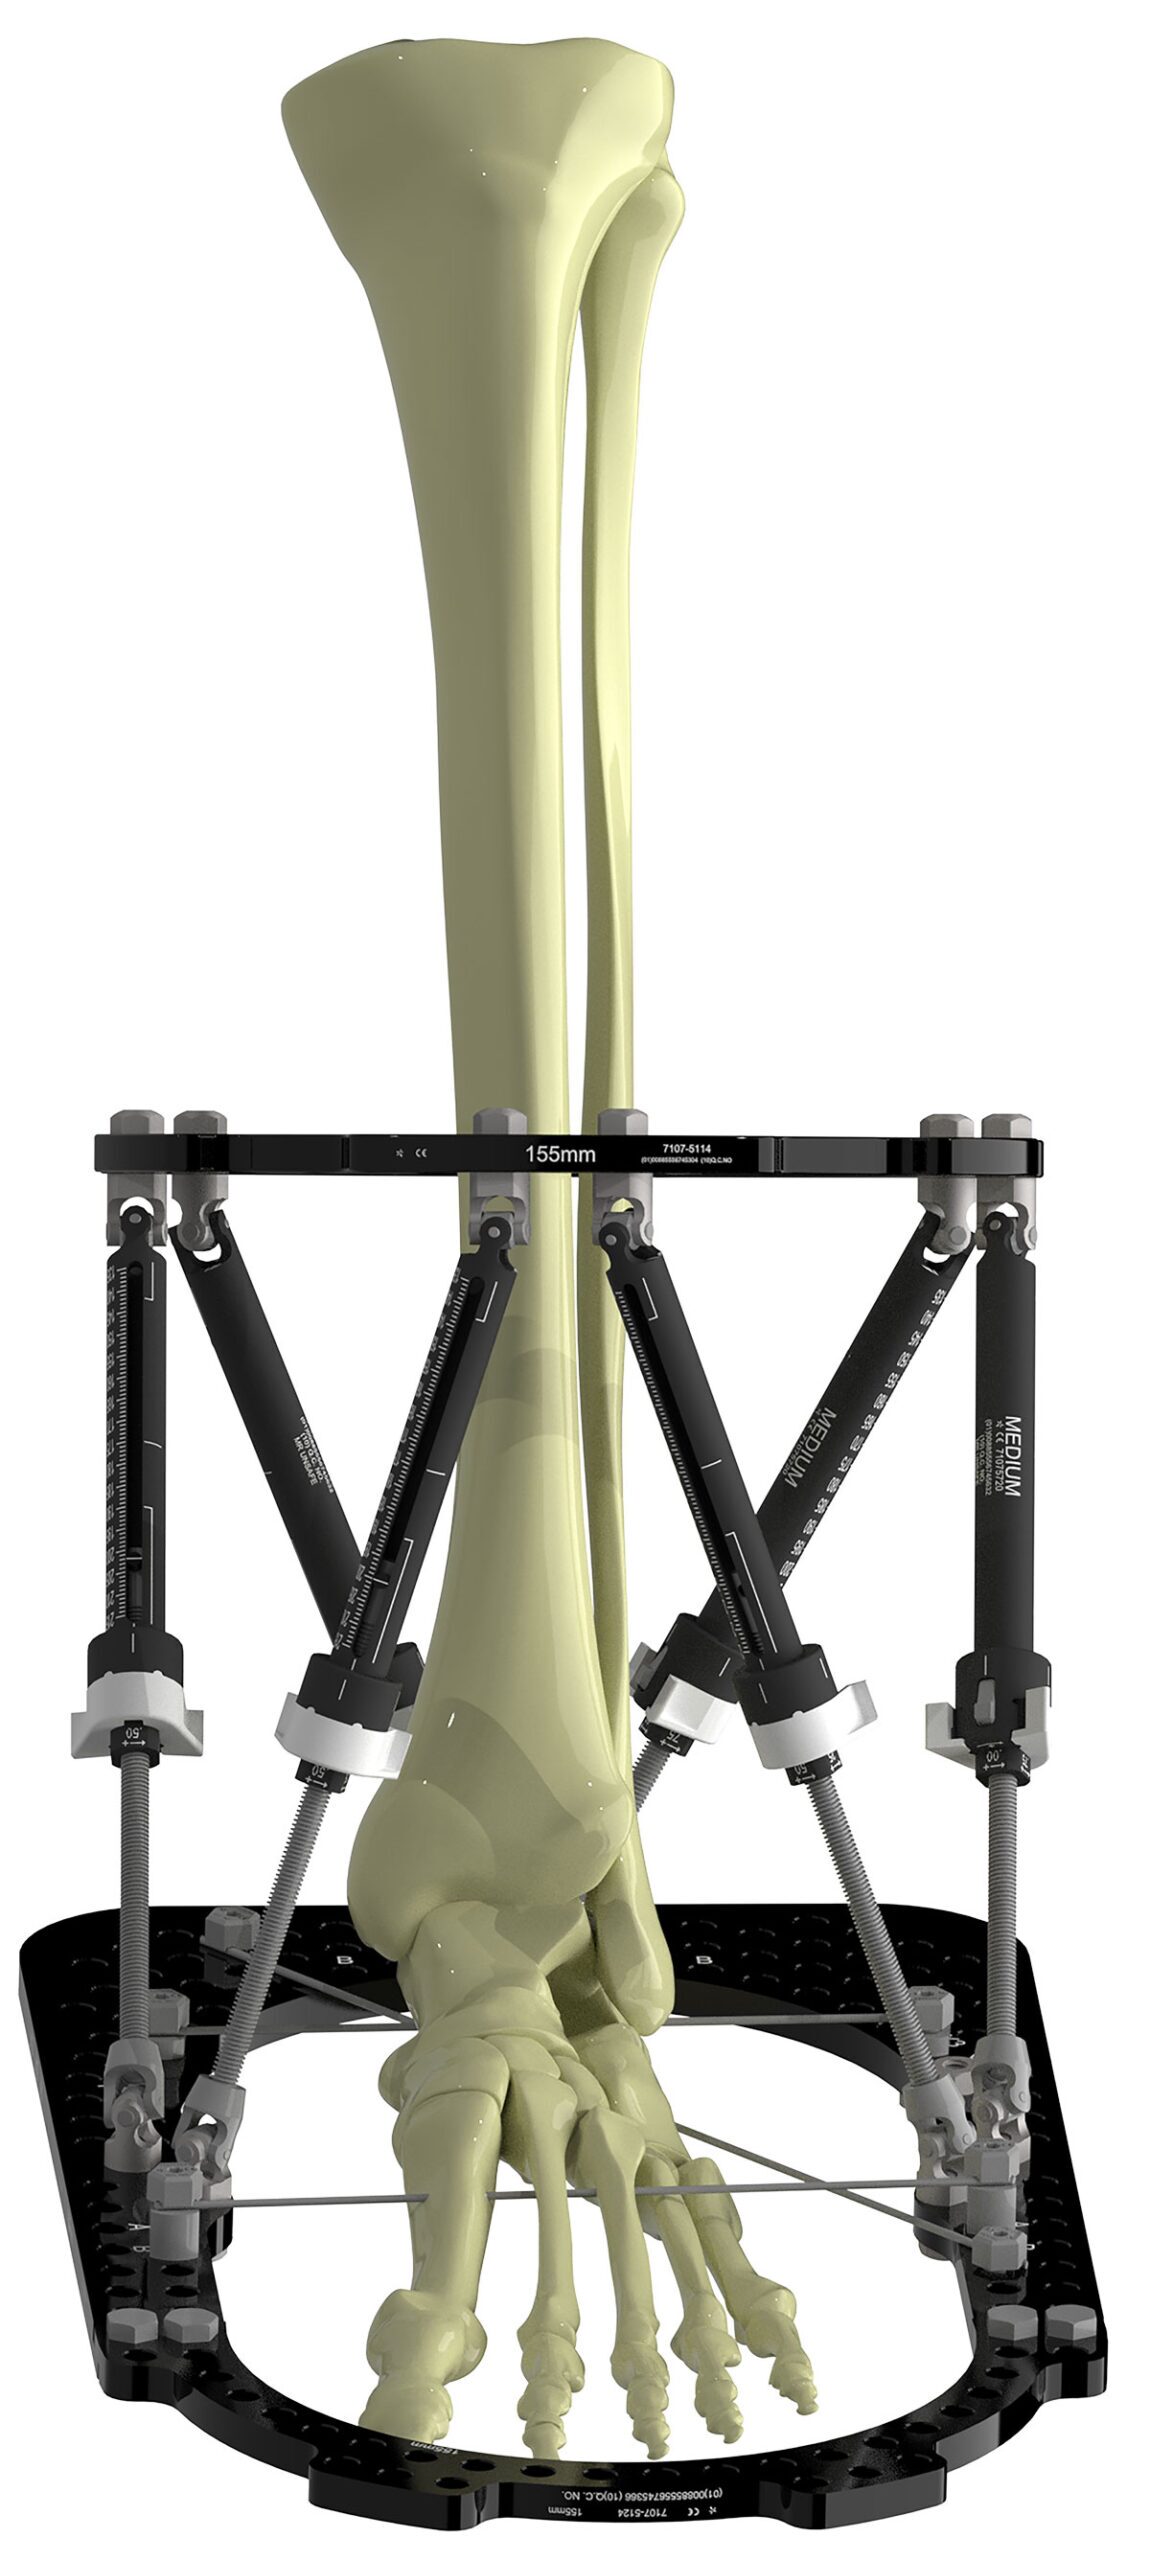
The Full Ring resting near the knee can now be brought to the distal tibia and connected to the Foot Ring with six Medium and Long Struts. The severity of the deformity may dictate this. Struts 3 and 6 tend to be Long.
With Struts unlocked, the position of the proximal Ring is chosen. A rolled up swab between the anterior cortex and surface of the Ring serves to ensure clearance, and allow two-finger-breadth check around its circumference.
Verify that the Struts have enough excursion to perform the correction (Figure 3a).
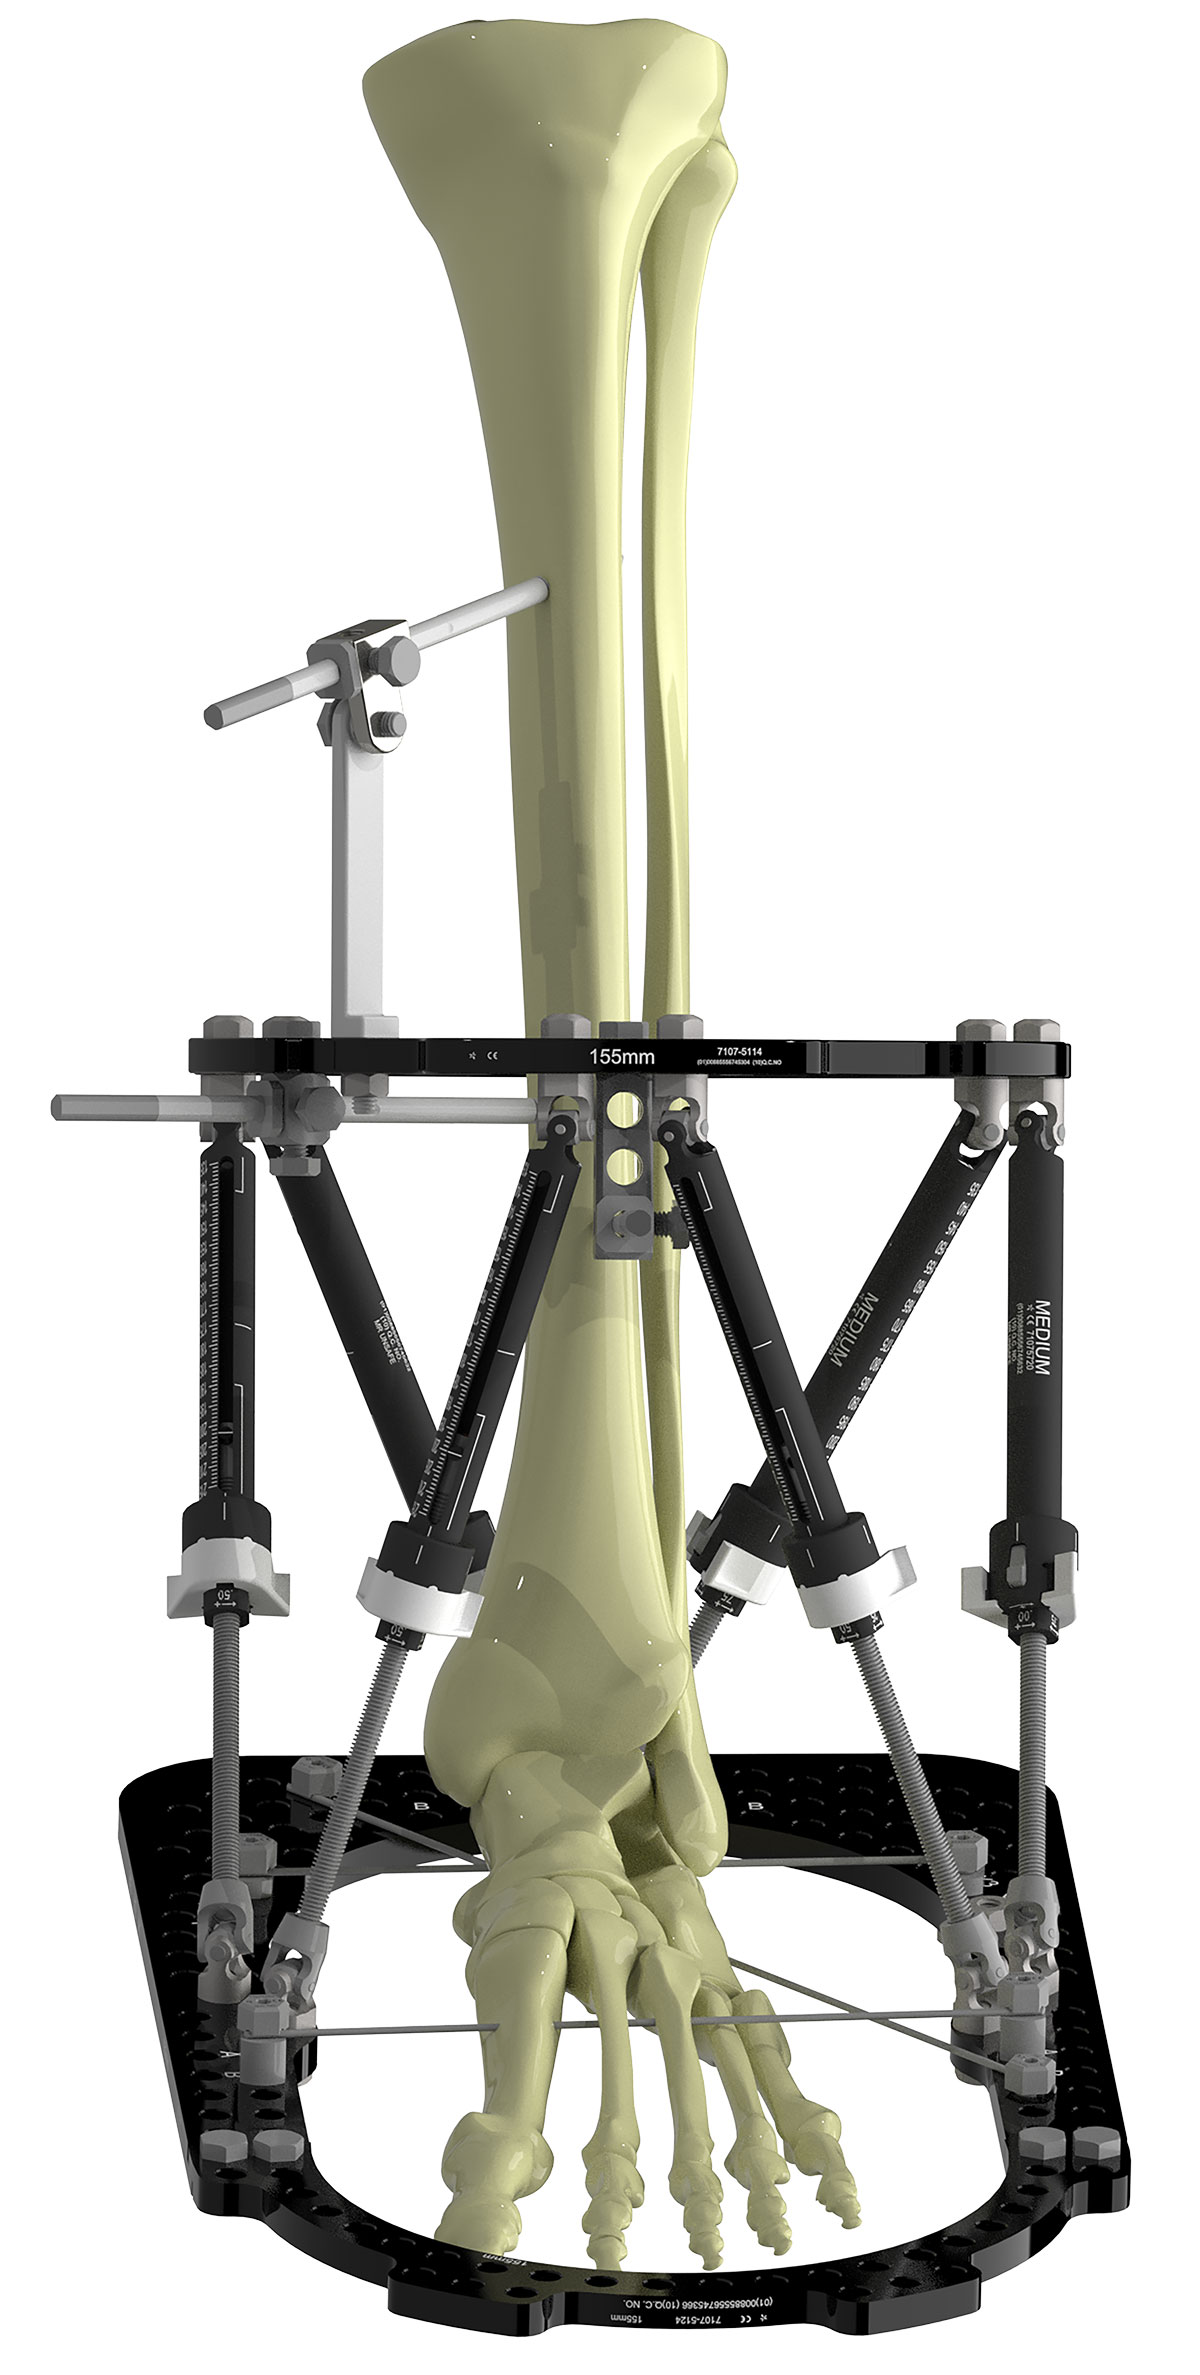
The Ring is stabilized using an antero-medial Half Pin through an 85mm Angled Pin Connector (Figure 3b).
Insertion of the second pin on the proximal Ring between Struts 1 and 2 (AP direction) offers the best mechanical advantage for the correction.
A third pin is inserted in the medial face of the anterior cortex, close to the Ring using a 1H Rancho or Pin Fixation Bolt (Figure 3b).
Crossing angle (of 90 degrees) is achieved over the anteromedial border of the tibia without causing soft tissue impingement and the construct has good spread along the tibia.
Additional fixation is added to the foot. Two talar wires are inserted under X-ray control.
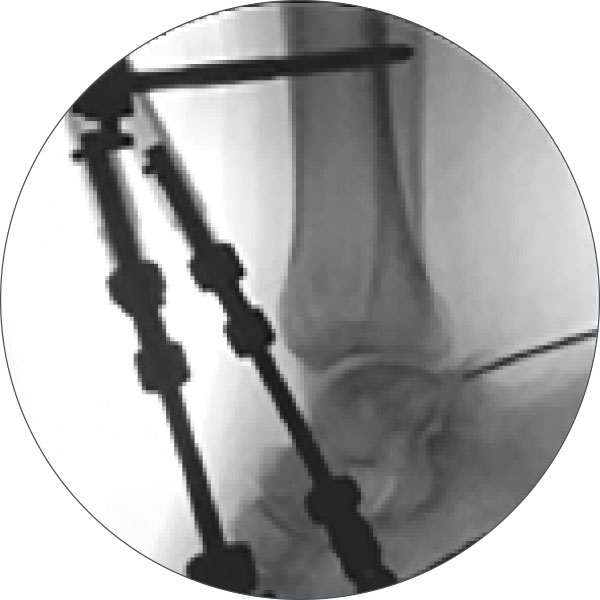
One wire is inserted posterolateral to anteromedial. The insertion point is medial to the peroneal tendons, midway to the lateral border of Tendo Achilles. After the wire is inserted through the skin, it is placed on the posterolateral process of the talus. Trajectory is lined up on X-ray prior to intra-osseous insertion (Figures 4a and 4b).
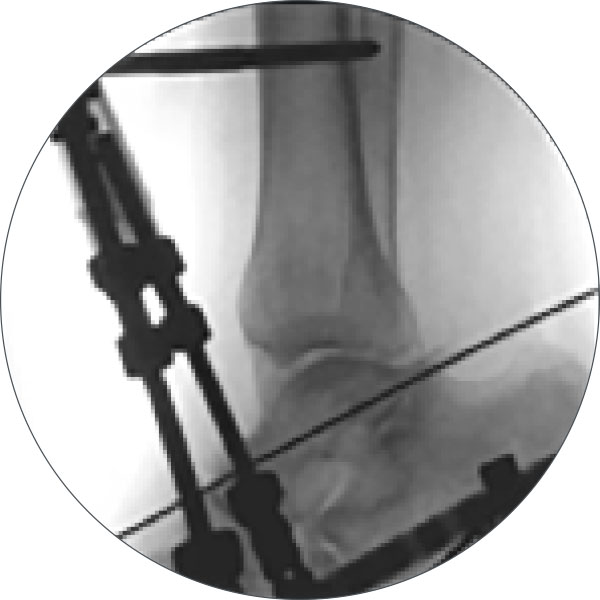
The second wire is inserted lateral to medial under X-ray guidance (Figure 4c).
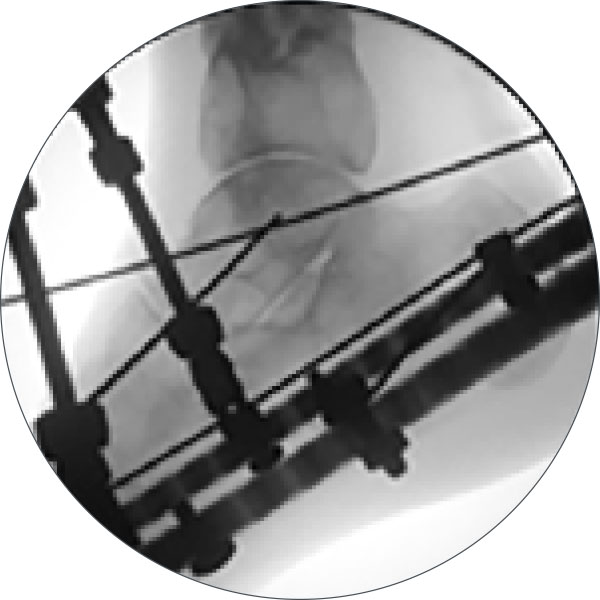
Fixation is built up from the Foot Ring to meet the wire. See the assembly of Socket and Post in Figure 5. Plates and Extended Connectors can also be employed. Additionally, Struts 3 and 6 can be moved 1-2 holes back to prevent collision with a talar wire. Note the hole positions for software entry later.
Both wires are tensioned to 50kg.
Each toe is pinned with 1.8mm wires. Occasionally, 1.5mm wires may be required in the fourth and fifth toe, and even 1.2mm for small anatomy (Figure 6).

Using SuperDot to digitally correct Equinus
Measure the deformity (Optional)
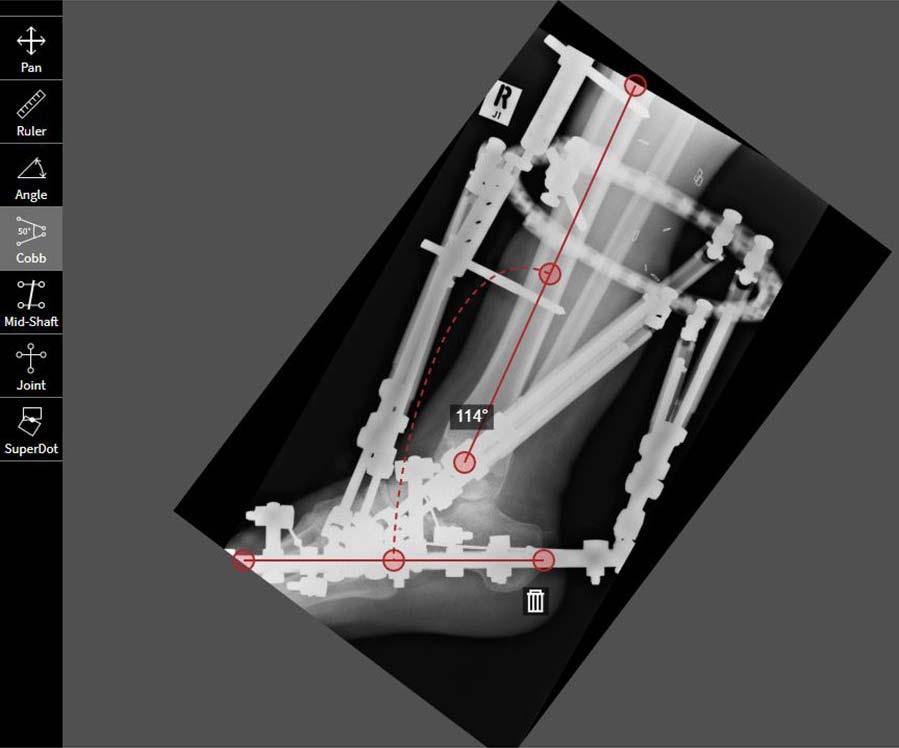
The Cobb angle tool can be used to measure the Equinus deformity on the Lateral view.
The Angle tool can then be used to draw the optimal angle, 90 degrees to the plantar surface (Figure 7a).
Measuring the deformity is optional, and not a requirement for the SuperDot method.
Plot the SuperDot
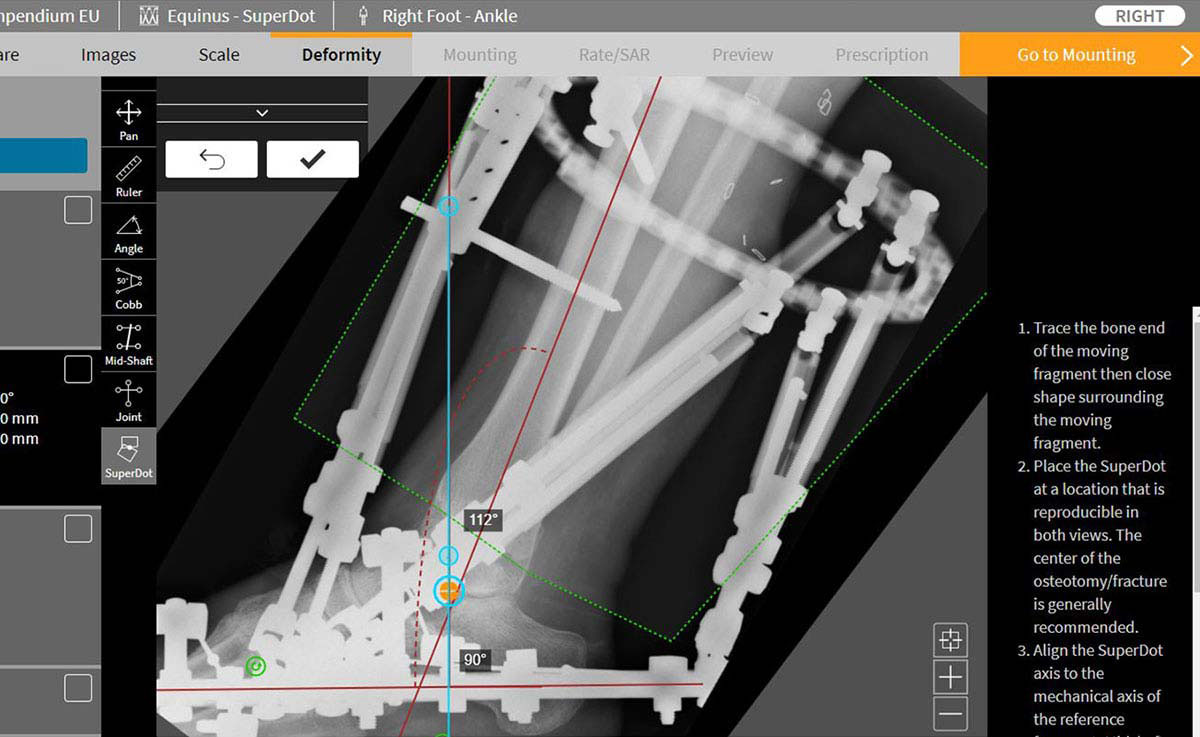
Trace out the moving fragment. As Equinus is distally referenced, the tibia will move around the ankle joint.
Draw the mechanical axis of the reference fragment in this case, the foot.
Position the SuperDot on the lateral process of the talus, or center of the ankle joint (Figure 7b).
Correct the bone
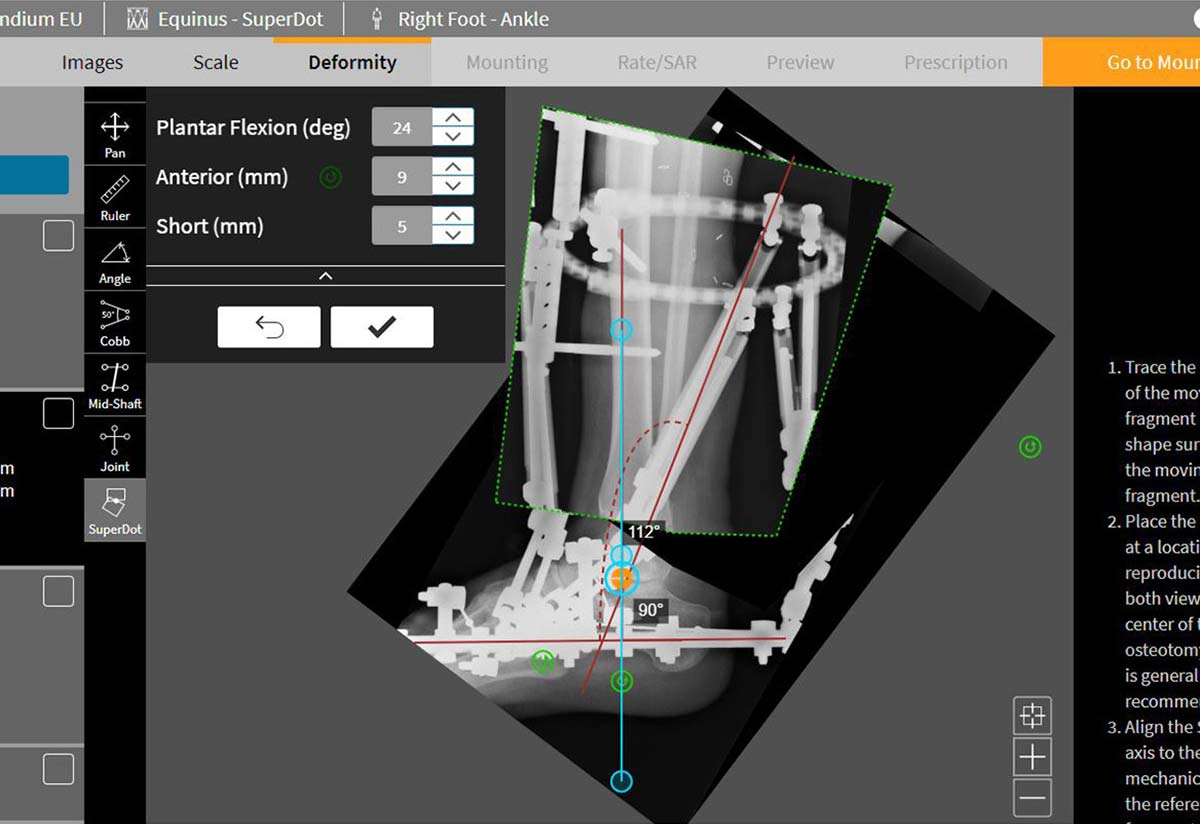
Manipulate the moving fragment and move it onto the mechanical axis. Add 5-10mm distraction (Figure 7c).
The deformity is calculated as you move. Fine adjustments can be made using the nudge buttons.
Once anatomical alignment is restored, accept the correction.
There is typically no deformity on the AP. The software requires zero deformity to be confirmed by plotting the SuperDot and leaving the correction at zero. Remember to select “Lateral” for the chosen view that drives axial translation.
Post-operative considerations
Post-operative pain relief is important. Correction can begin right away.
The ankle joint is first distracted by 5-10mm.
Equinus correction is performed at 1 degree per day.
Over-correction of 10-15 degree dorsiflexion is optimal.
The position is held for six weeks after correction.
Upon frame removal, a night splint is applied for an additional six weeks. Continued physiotherapy to maintain correction is essential.
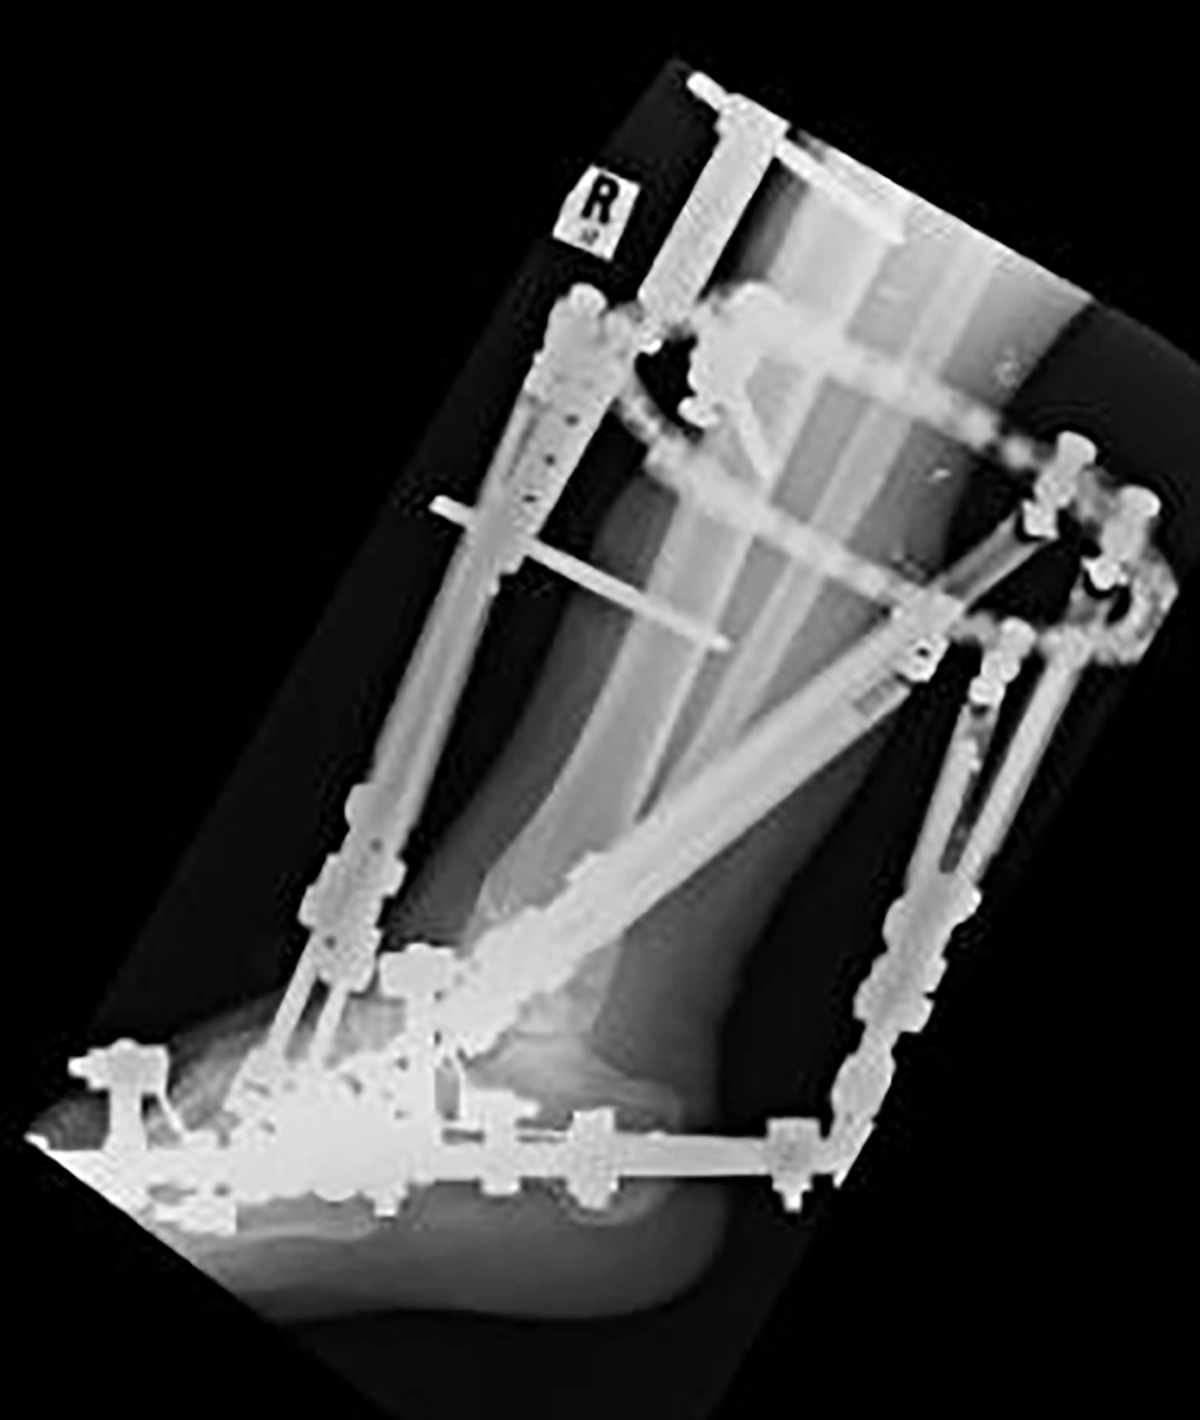
Case Example
Immediately post-op
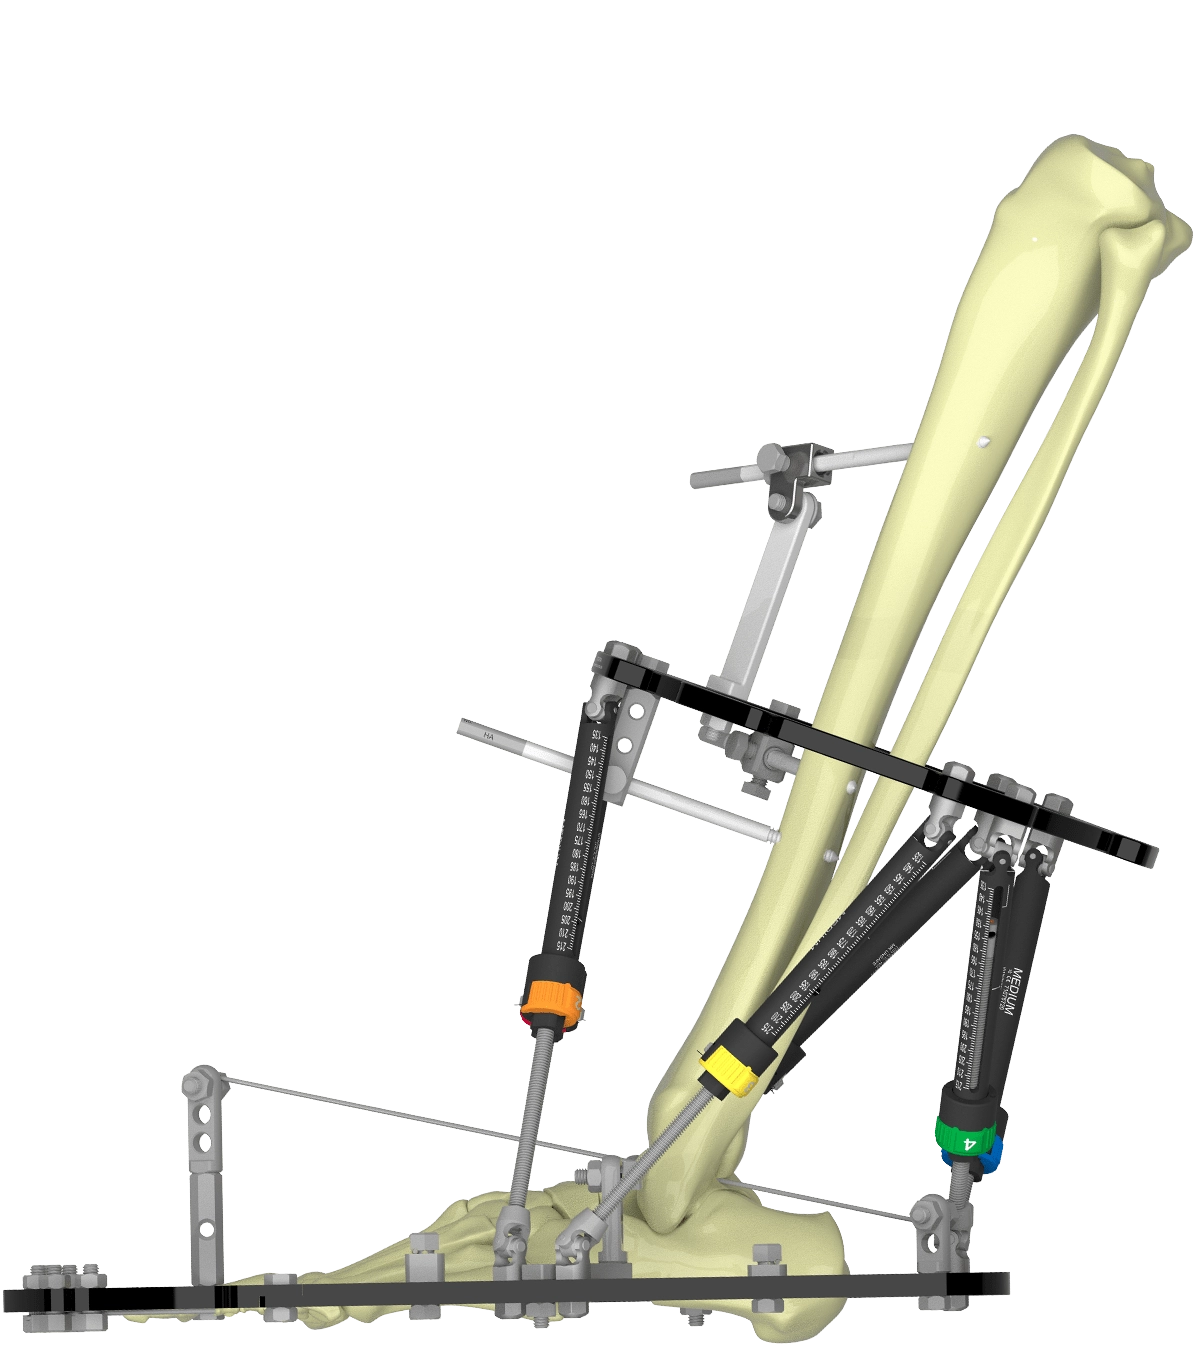
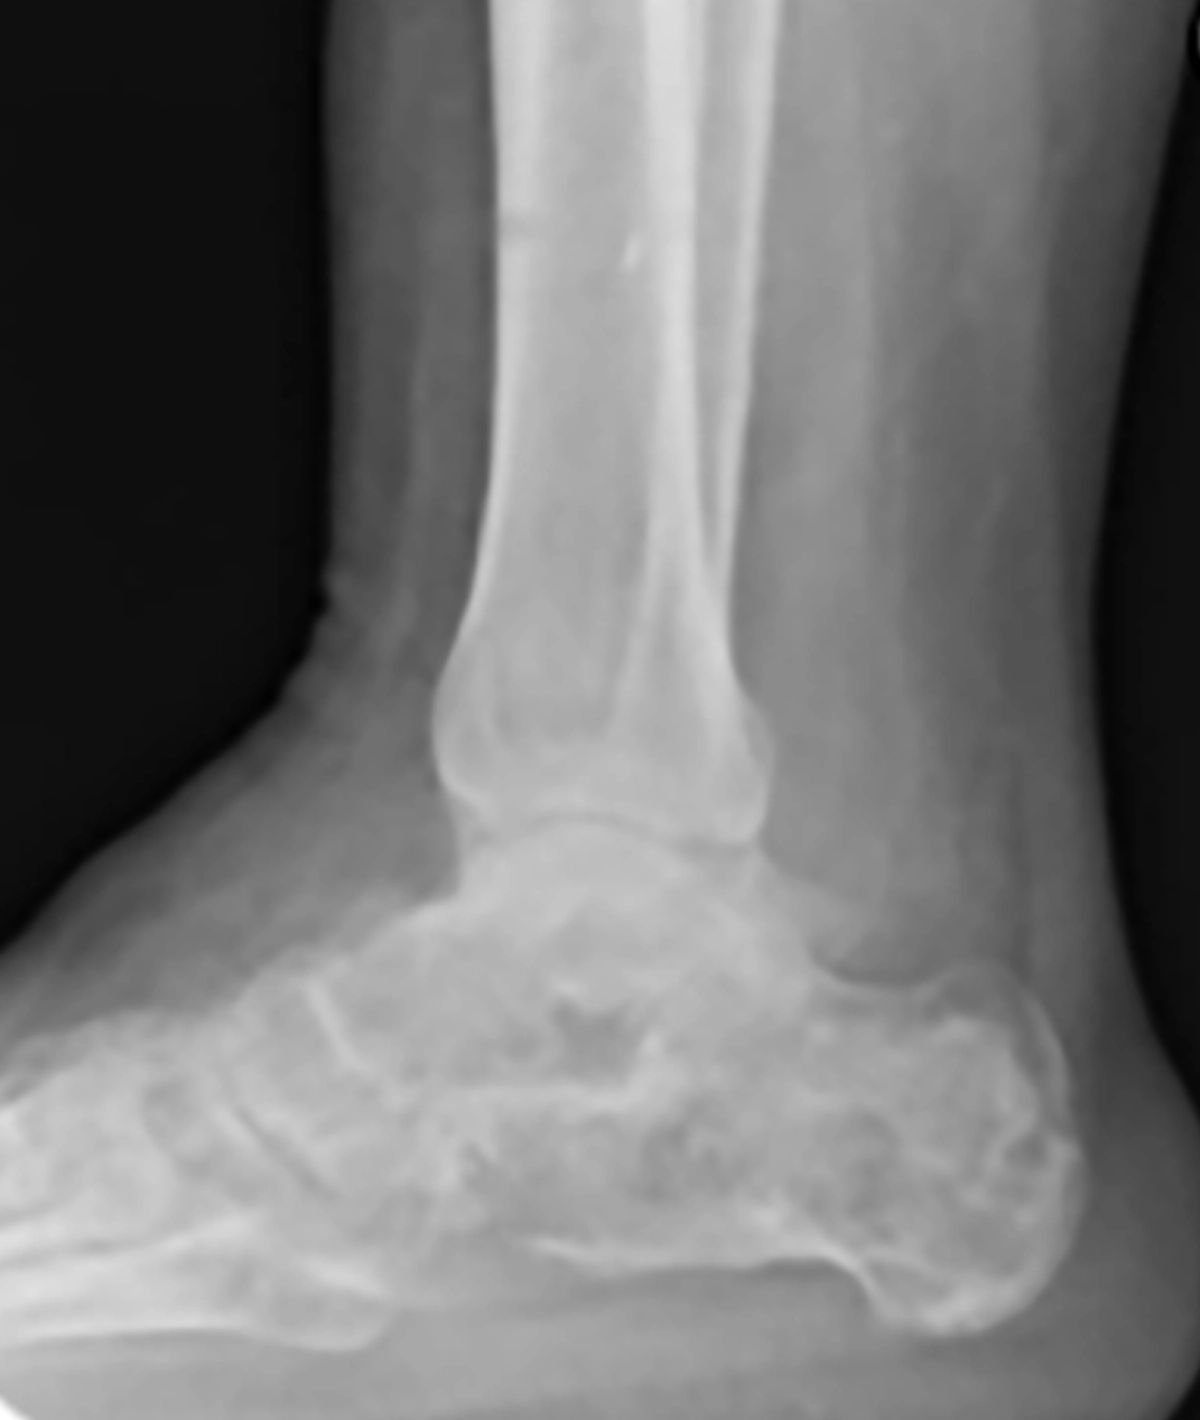
Correction complete
Suggested Videos