Digital deformity reduction method
B. J Ollivere, MBBS, FRCS, MD; University of Nottingham, UK
The views and opinions expressed in this section are those of the surgeon.

The traditional analyses of deformity and deformity correction are still as current today as they were when developed in parallel to circular Ilizarov fixators and later the TAYLOR SPATIAL FRAME◇ hexapod system. These original techniques all depend on initial deformity analysis and then often the use of carefully placed hinges to correct the deformity with a suitably placed osteotomy. The most common (and still used) technique is that of the center of rotation and angulation (CORA). Later with the development of the hexapod system “rules free corrections” were enabled as the frame can move in six degrees of freedom allowing for more complex corrections. This has evolved in a number of different directions including the origin and corresponding point method and more recently the SuperDot technique. While powerful tools, these again are designed to straighten a deformed bone although all have been used in fracture reduction.
The TraumaDots method is a rules-free deformity correction method that is designed to straighten a fractured or deformed bone. The system is a simple technique to allow complex deformity corrections. It is ideal for the reduction of fractures, removal of residual deformity in an applied frame or for correction of progressive deformities such as a Charcot foot. As it does not rely on a “cut out,” TraumaDots is particularly helpful when correcting complex deformities such as Charcot or shortened fractures as all the reduction points can be visualized prior to the correction of the fracture.
Concept of TraumaDots
When undertaking a fracture reduction in open surgery, surgeons will use “reduction keys” to align fracture fragments. The surgeon does not have the advantage of long leg alignment views, however, can achieve a reduction both at the fracture site and along the axis of the limb through accurate direct fracture reduction. When undertaking nailing the converse is true. Indirect reduction is undertaken with care to attend to the longitudinal axis of the bone in order to achieve an overall satisfactory alignment of the limb. In some complex cases the nail can be used to achieve an indirect reduction purely through use of the long axis of the limb.
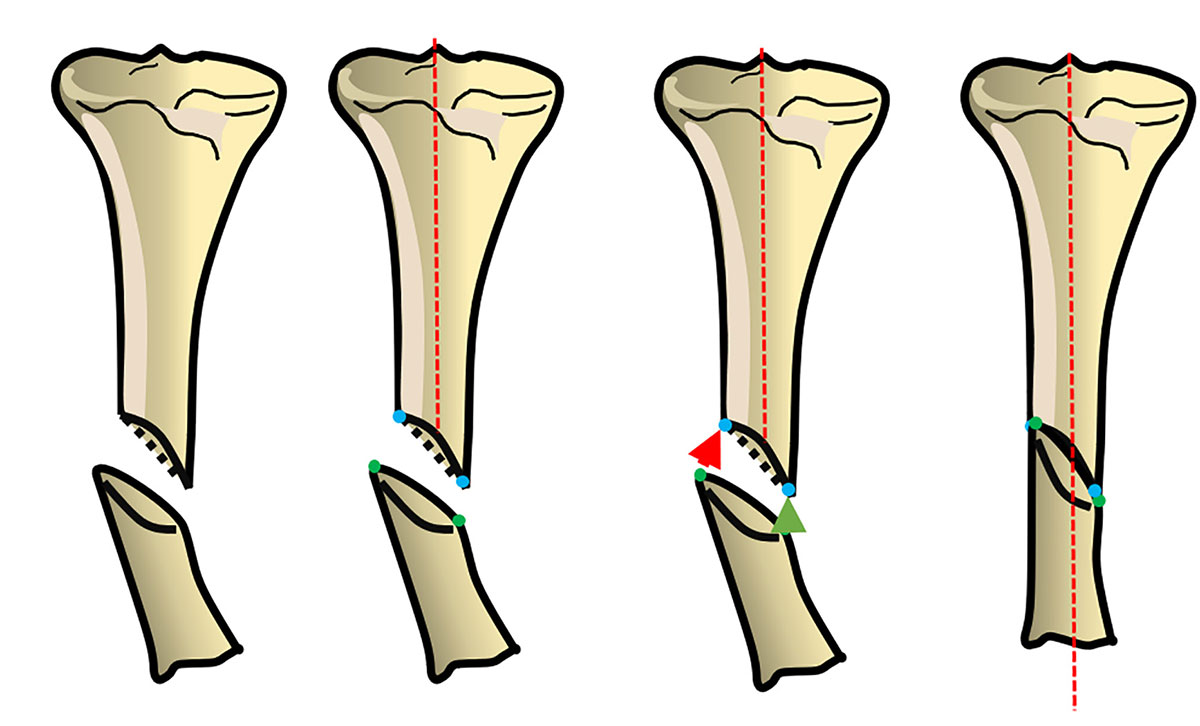
TraumaDots is a method for achieving direct reduction and overall limb alignment through the use of two matching reduction keys (Figure 1).
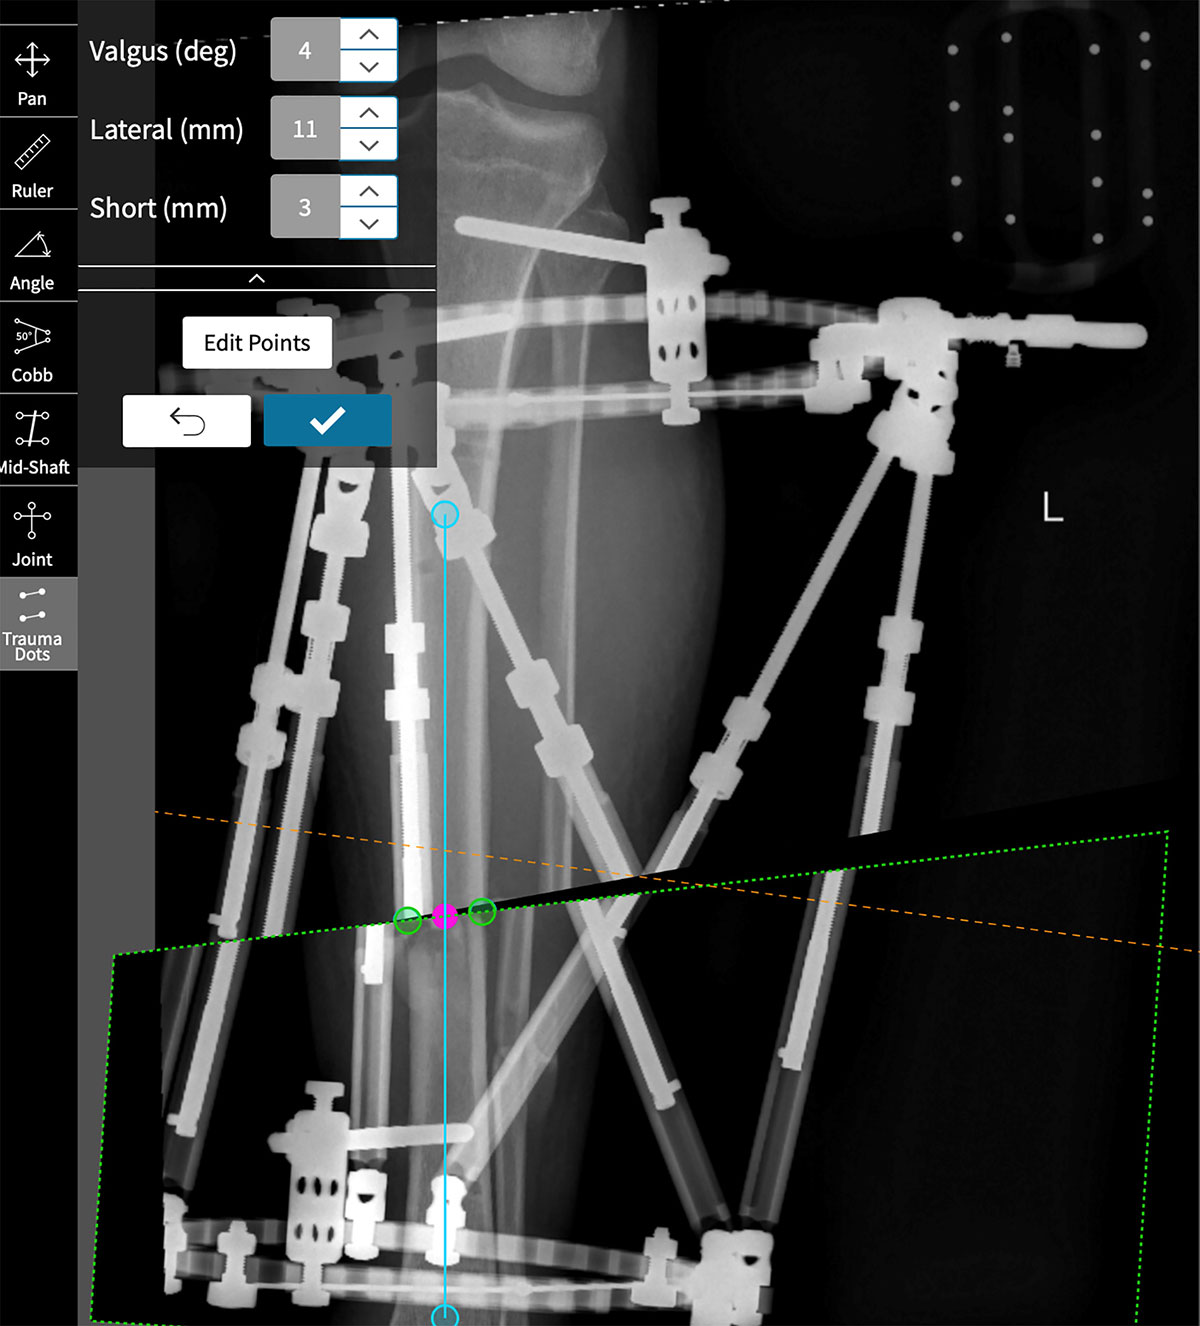
Use of the “nudge” buttons to fine tune TraumaDots correction
Consider a displaced fracture (Figure 2a), reduction of a single point (origin and corresponding point method), (Figure 2b) cannot accurately reduce the fracture; however, the use of two points
(Figure 2c) can.
In clinical practice the identification of two points per fragment can also be used to both reduce the fracture and calculate the axis line of the reference fragment allowing deformity measurements to be calculated (Figure 3). If the Beacon is used then AP and Lateral images are tied together in 3D space allowing for digital deformity correction.
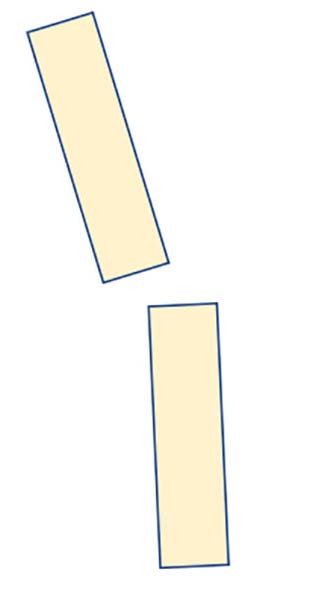
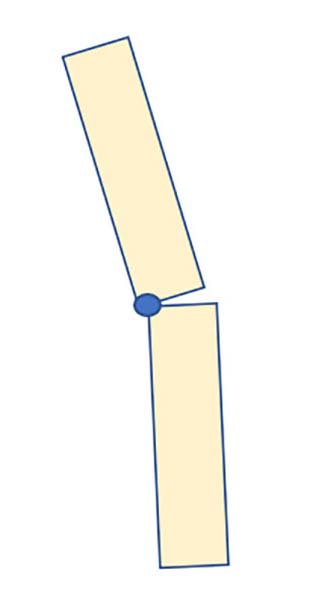
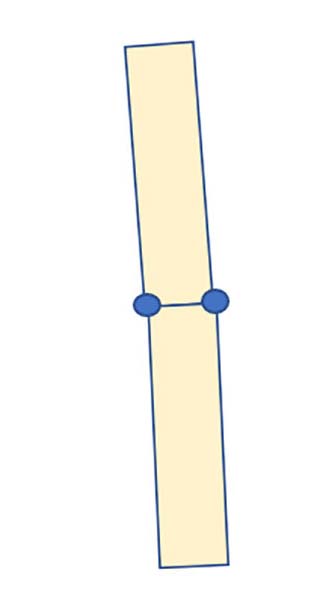
TraumaDots can be used when there is comminution, shortening or for complex deformities with shortening where it can be easier to utilize than other methods. However in these circumstances the “nudge” buttons (Figure 4) are likely to be needed to fine tune the correction.
X-ray images for TraumaDots
TraumaDots can be used in either distal or proximal referencing. The ideal X-rays are orthogonal to each other and focused on the fracture site. Use of the Beacon is not essential; however, it is designed to increase the accuracy of deformity correction and mounting parameter measurements and is recommended.
In order to achieve accurate deformity correction it is essential to rotate the radiographs once they have been imported (Figure 4).

Correctly rotated images
Undertaking deformity correction
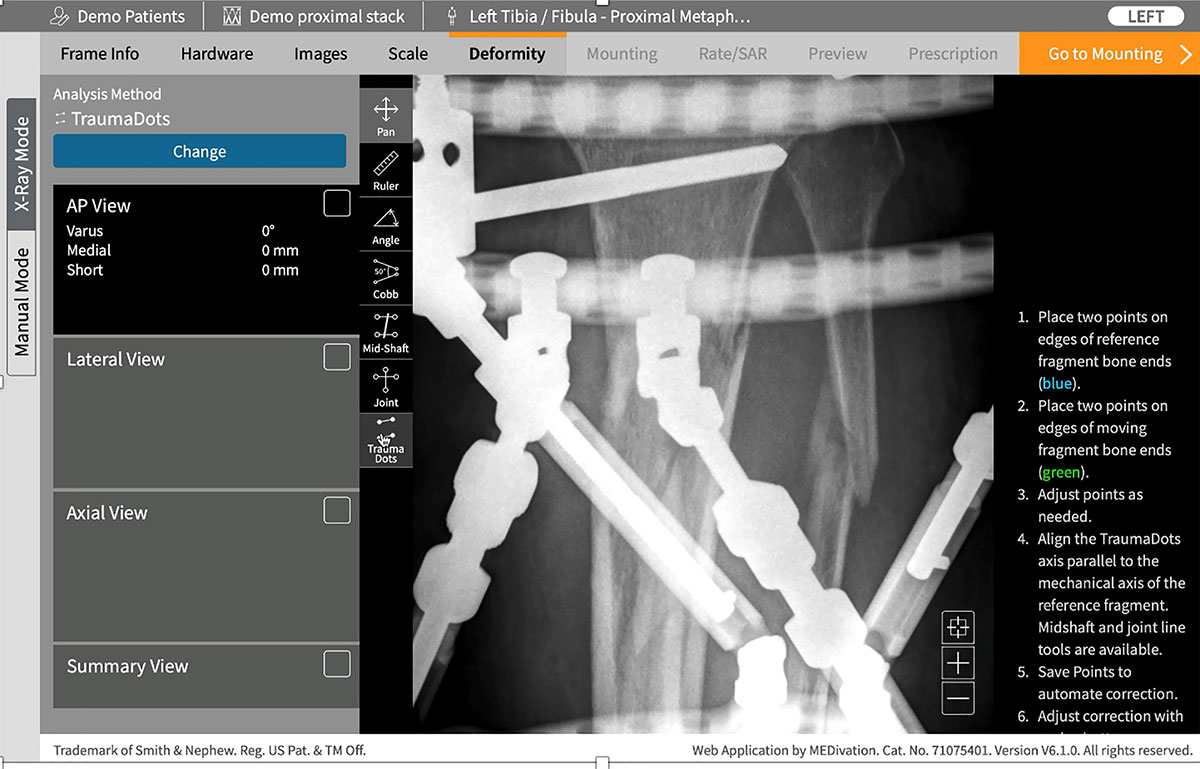
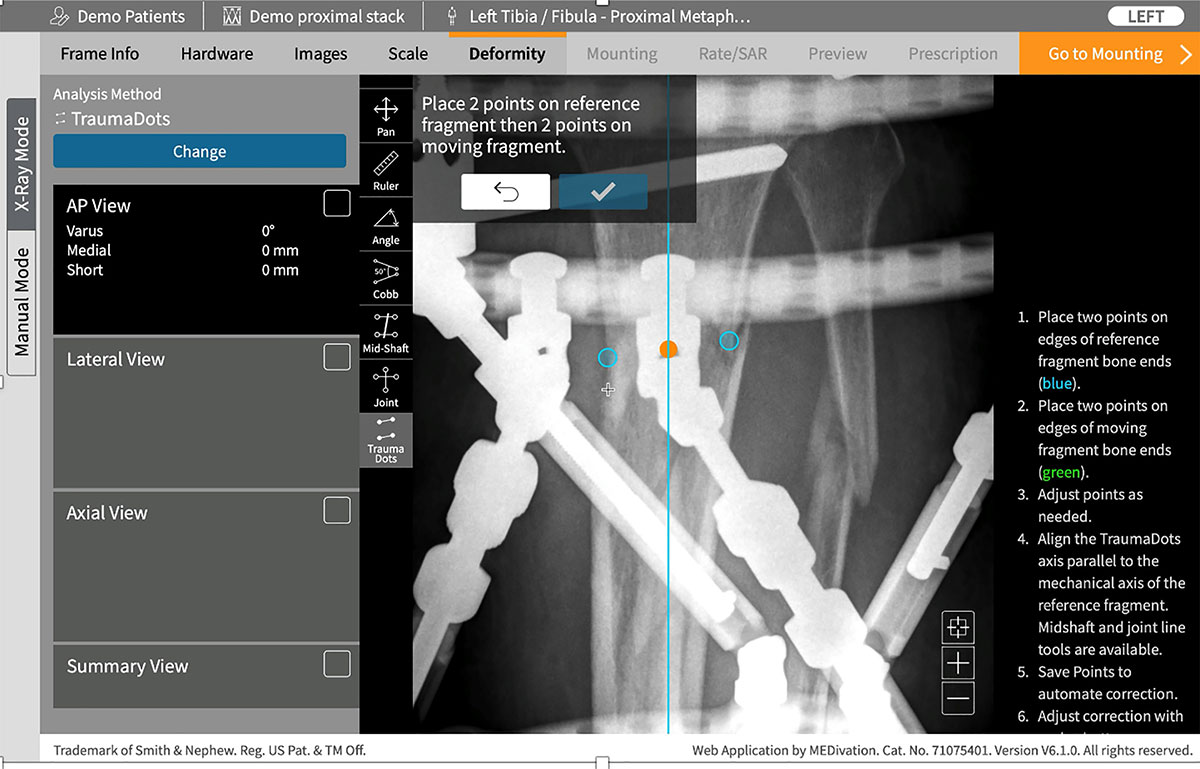
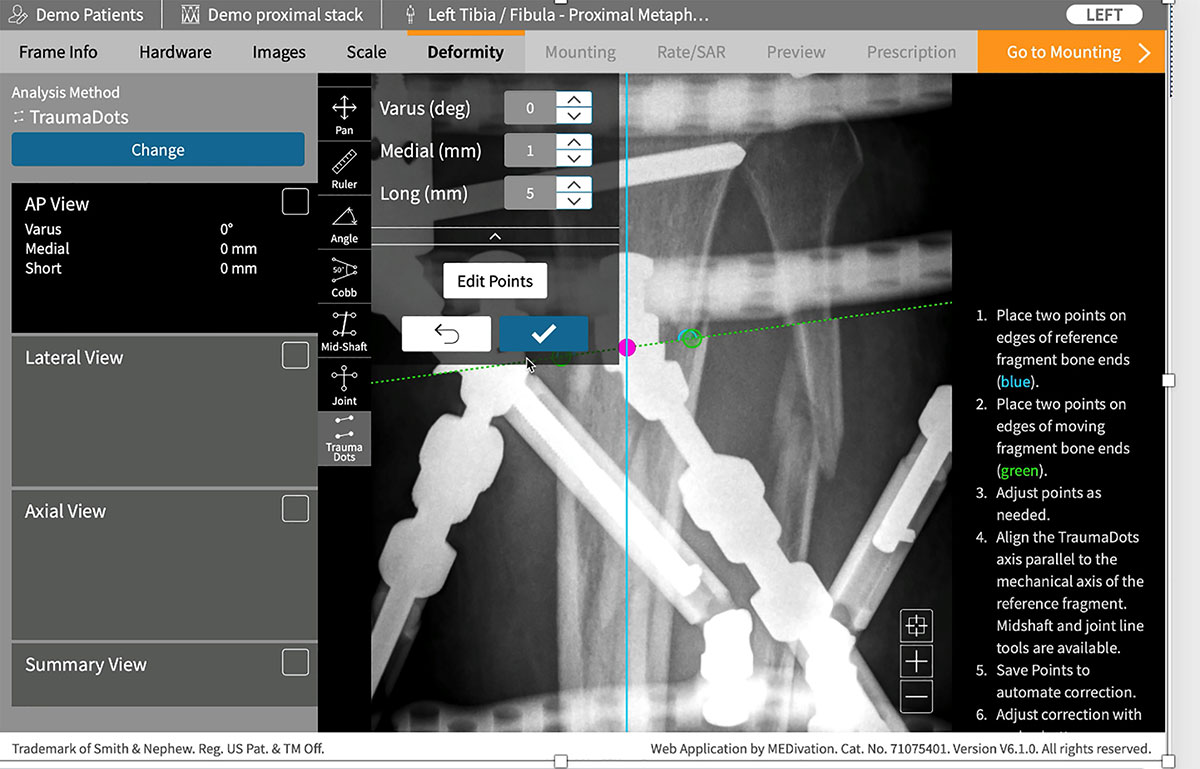
Once the X-rays are successfully imported, rotated, and the Beacon has been recognized the provisional reduction is undertaken. To achieve this first zoom in on the X-ray (Figure 5a). Start with the reference fragment first and identify the two reduction keys and mark them on the X-ray. They may be moved, or restarted until the “tick” box is clicked (Figure 5b). At this point the software will add the long axis of the bone in its presumed position. This can be adjusted if necessary. Next mark the moving fragment reduction keys (Figure 5c). The software calculates an origin (orange) and corresponding point (pink). Clicking “save points” will apply the reduction (Figure 5d) and allow for fine tuning with the “nudge” arrows.
